The option to create a new gallery can be found in the upper right corner, after selecting the "Galleries" item in the "Content" drop-down menu of the navigation bar. If you have already created some galleries, you will also find the overview at the same point.

First, some default settings have to be done (e.g. brand, category , level of trade, etc.), which are necessary for content in OXOMI. After saving your settings you will be redirected to the uploader.
There you can simply upload one or more images, which are supposed to be part of the gallery. In order to do so, you can use the drag-and-drop area on the left side or choose a file from your computer via the button underneath. Please wait until the upload is completed, the progress can be monitored on the left side. Thereafter the uploaded images are directly editable.

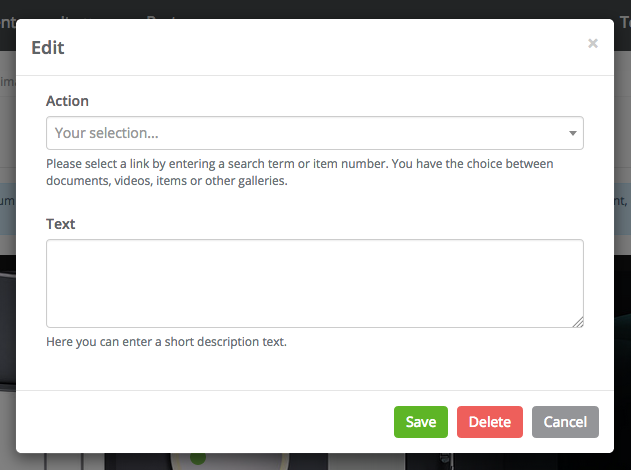
With a click on "Edit", you will be taken to the individual view of the image. There you can simply link any content or item you have provided. Just click where you want to place the link. If necessary for further explanation, you can add a short description as well
Important: If you want to create a 360° gallery, you need to change the image mode from "normal" to "360°" after uploading, before you link content on the image. If you change the mode later, the links will vanish. To create 360° galleries, the upgrade with the same name is required.
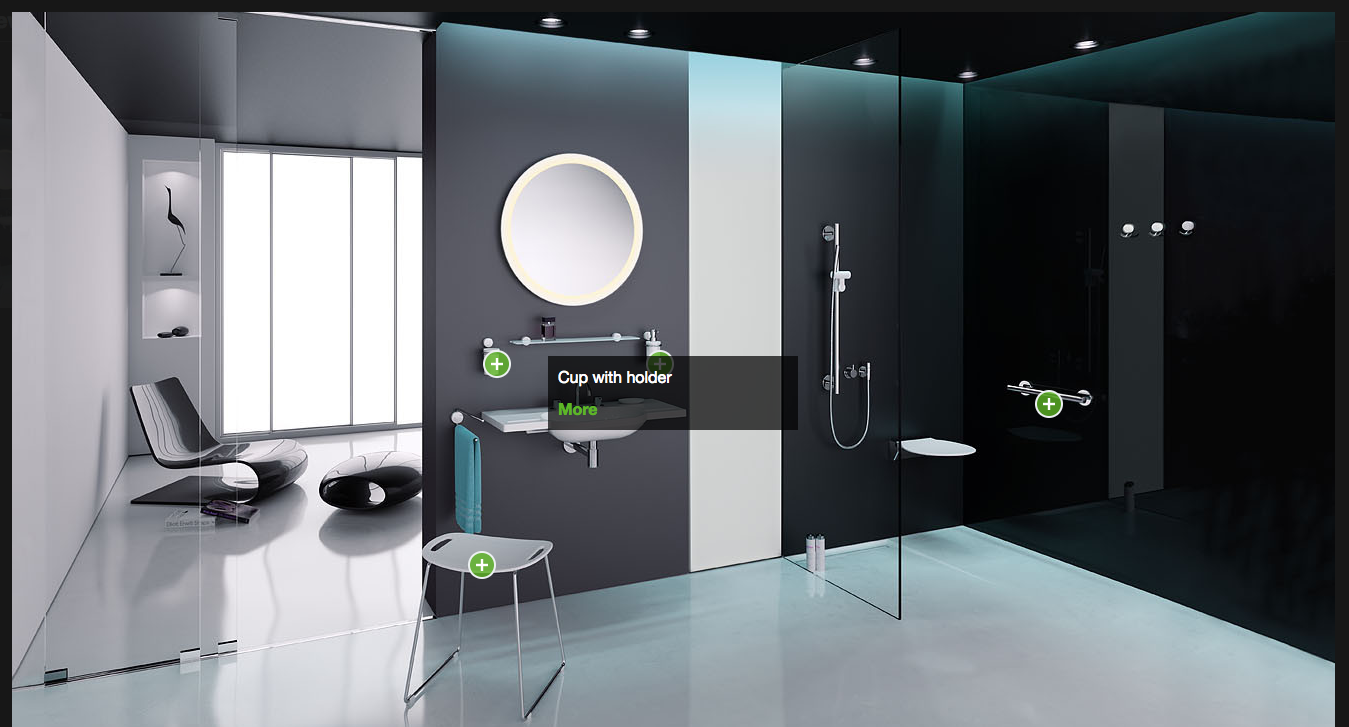
An example for a 360° gallery can be found here. A standard gallery could, for example, look like this:
Everything done? Do not forget to save your settings.
Click on "Back" to return to the overview of your galleries. Here you have the possibility to delete your uploaded images, change them (this includes linking new content) and edit the settings of a gallery. Next to the button “create gallery”, you can also export an Excel listing of your uploaded galleries.